How to Draw Eyes
Watch the video, then work through the reference sheets. Tap any sheet to open it full size and zoom in.
Realistic eyes START HERE
The basic almond shape, how the eyeball sits behind the lids, and where light reflects on the cornea versus shadows on the iris.
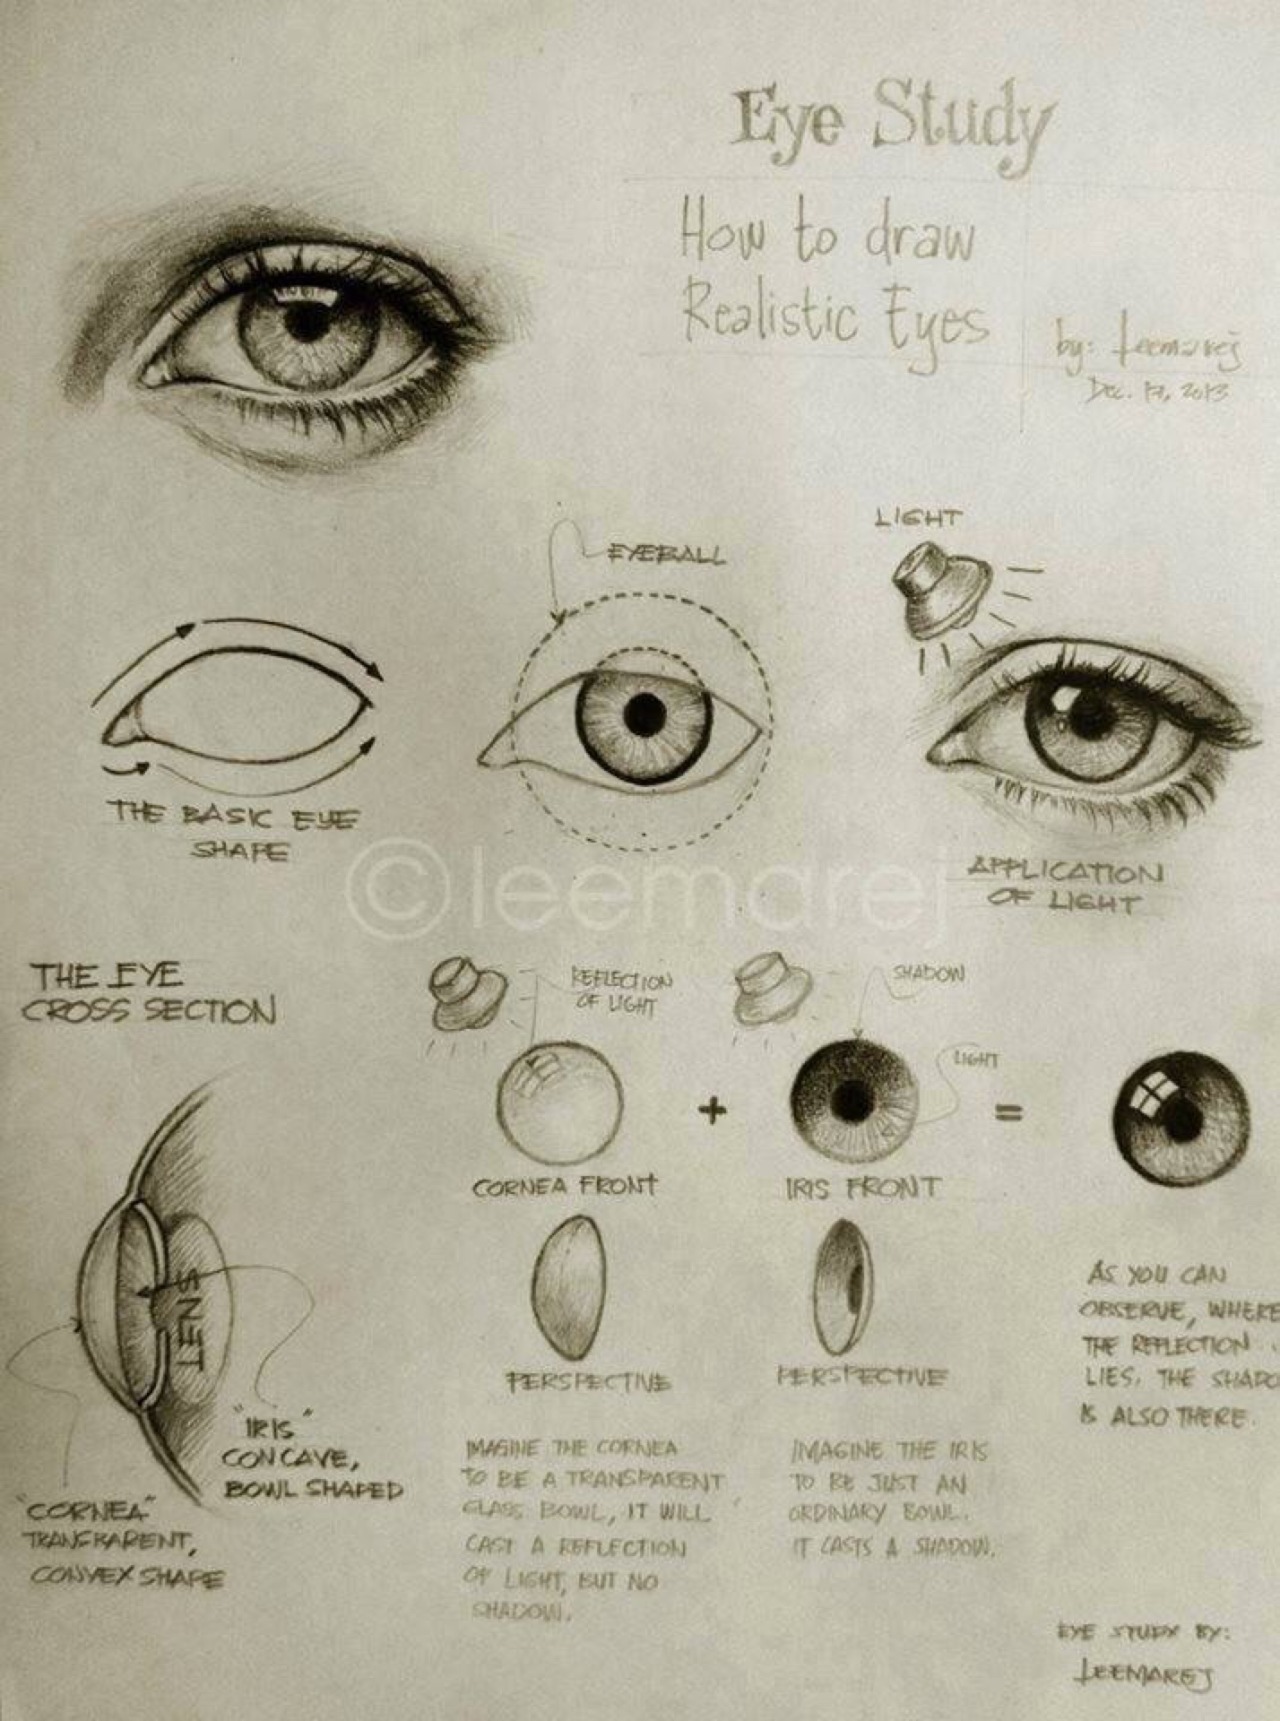
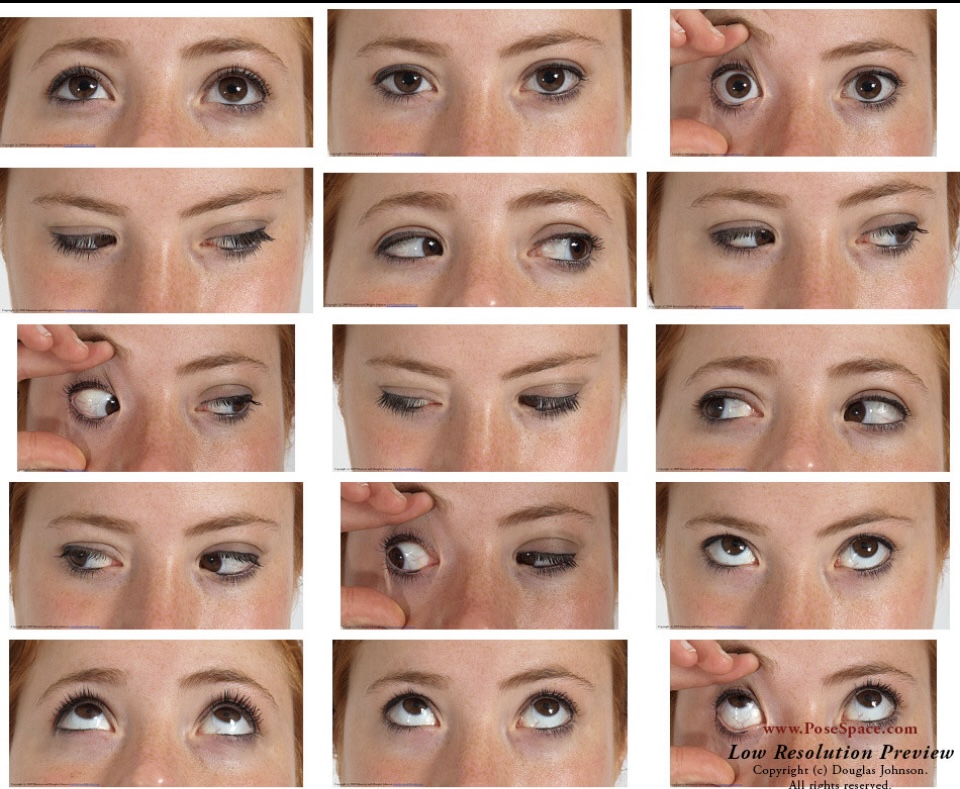
Photo reference
Real eyes looking in every direction, half-closed, and with lids held open. Notice how the lids wrap around the eyeball as it turns.
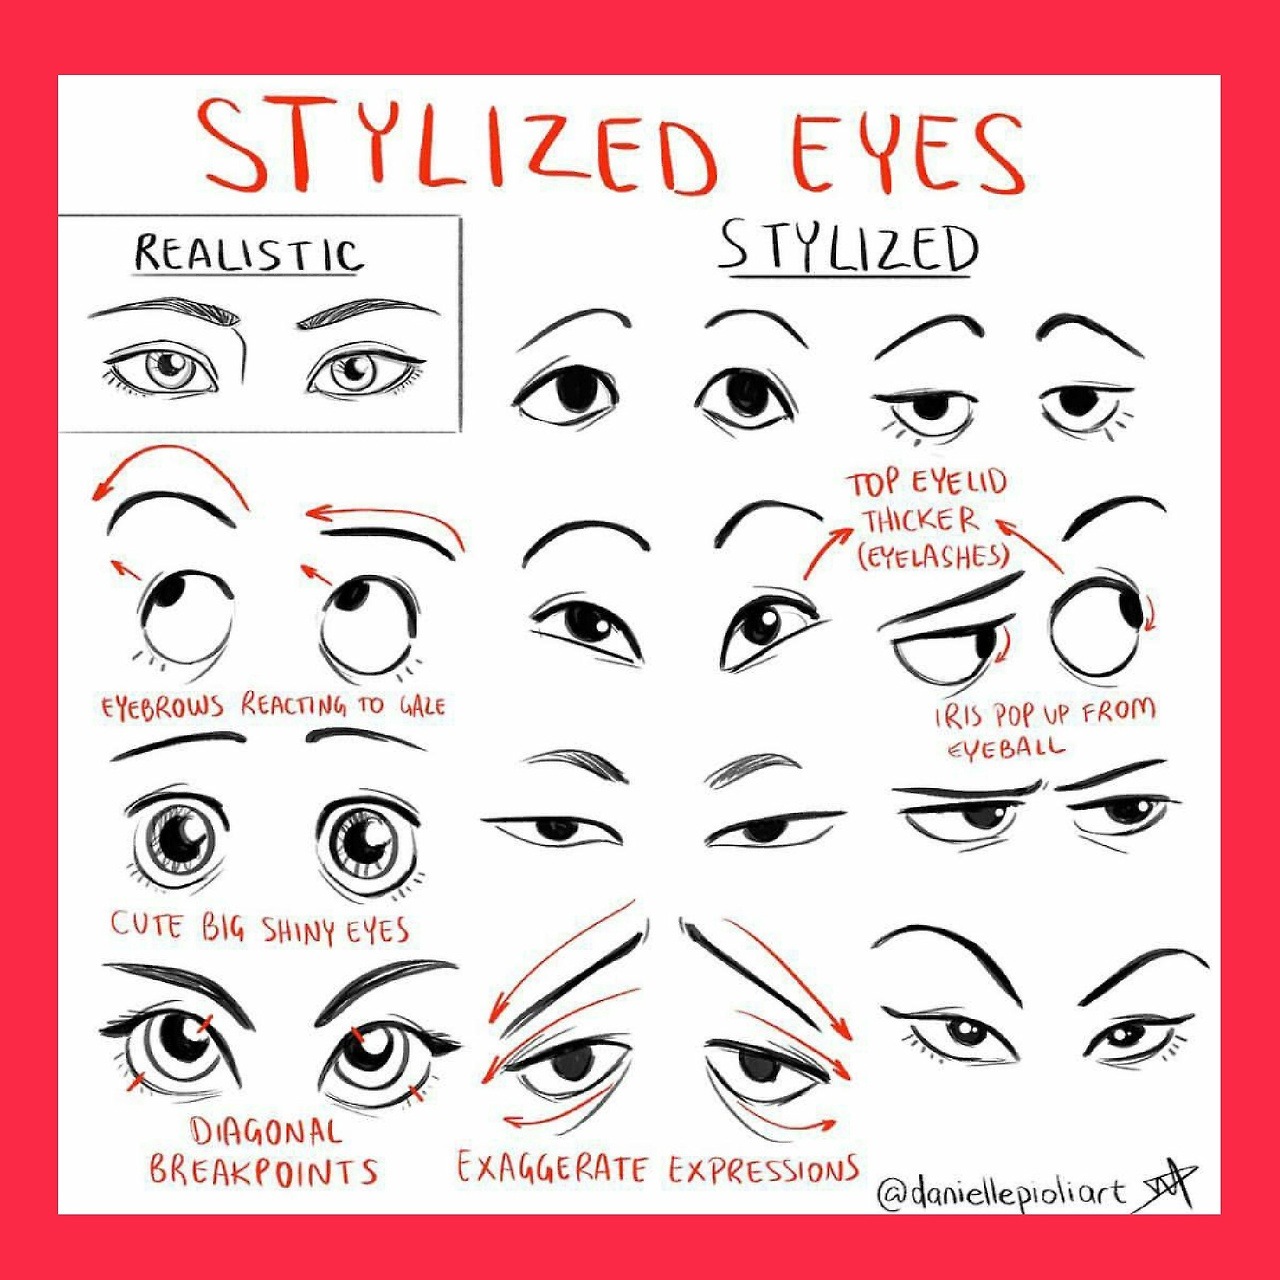
Stylized eyes
Simplify the realistic eye: thicker top lid, expressive eyebrows, exaggerated shapes, and big shiny cartoon eyes.
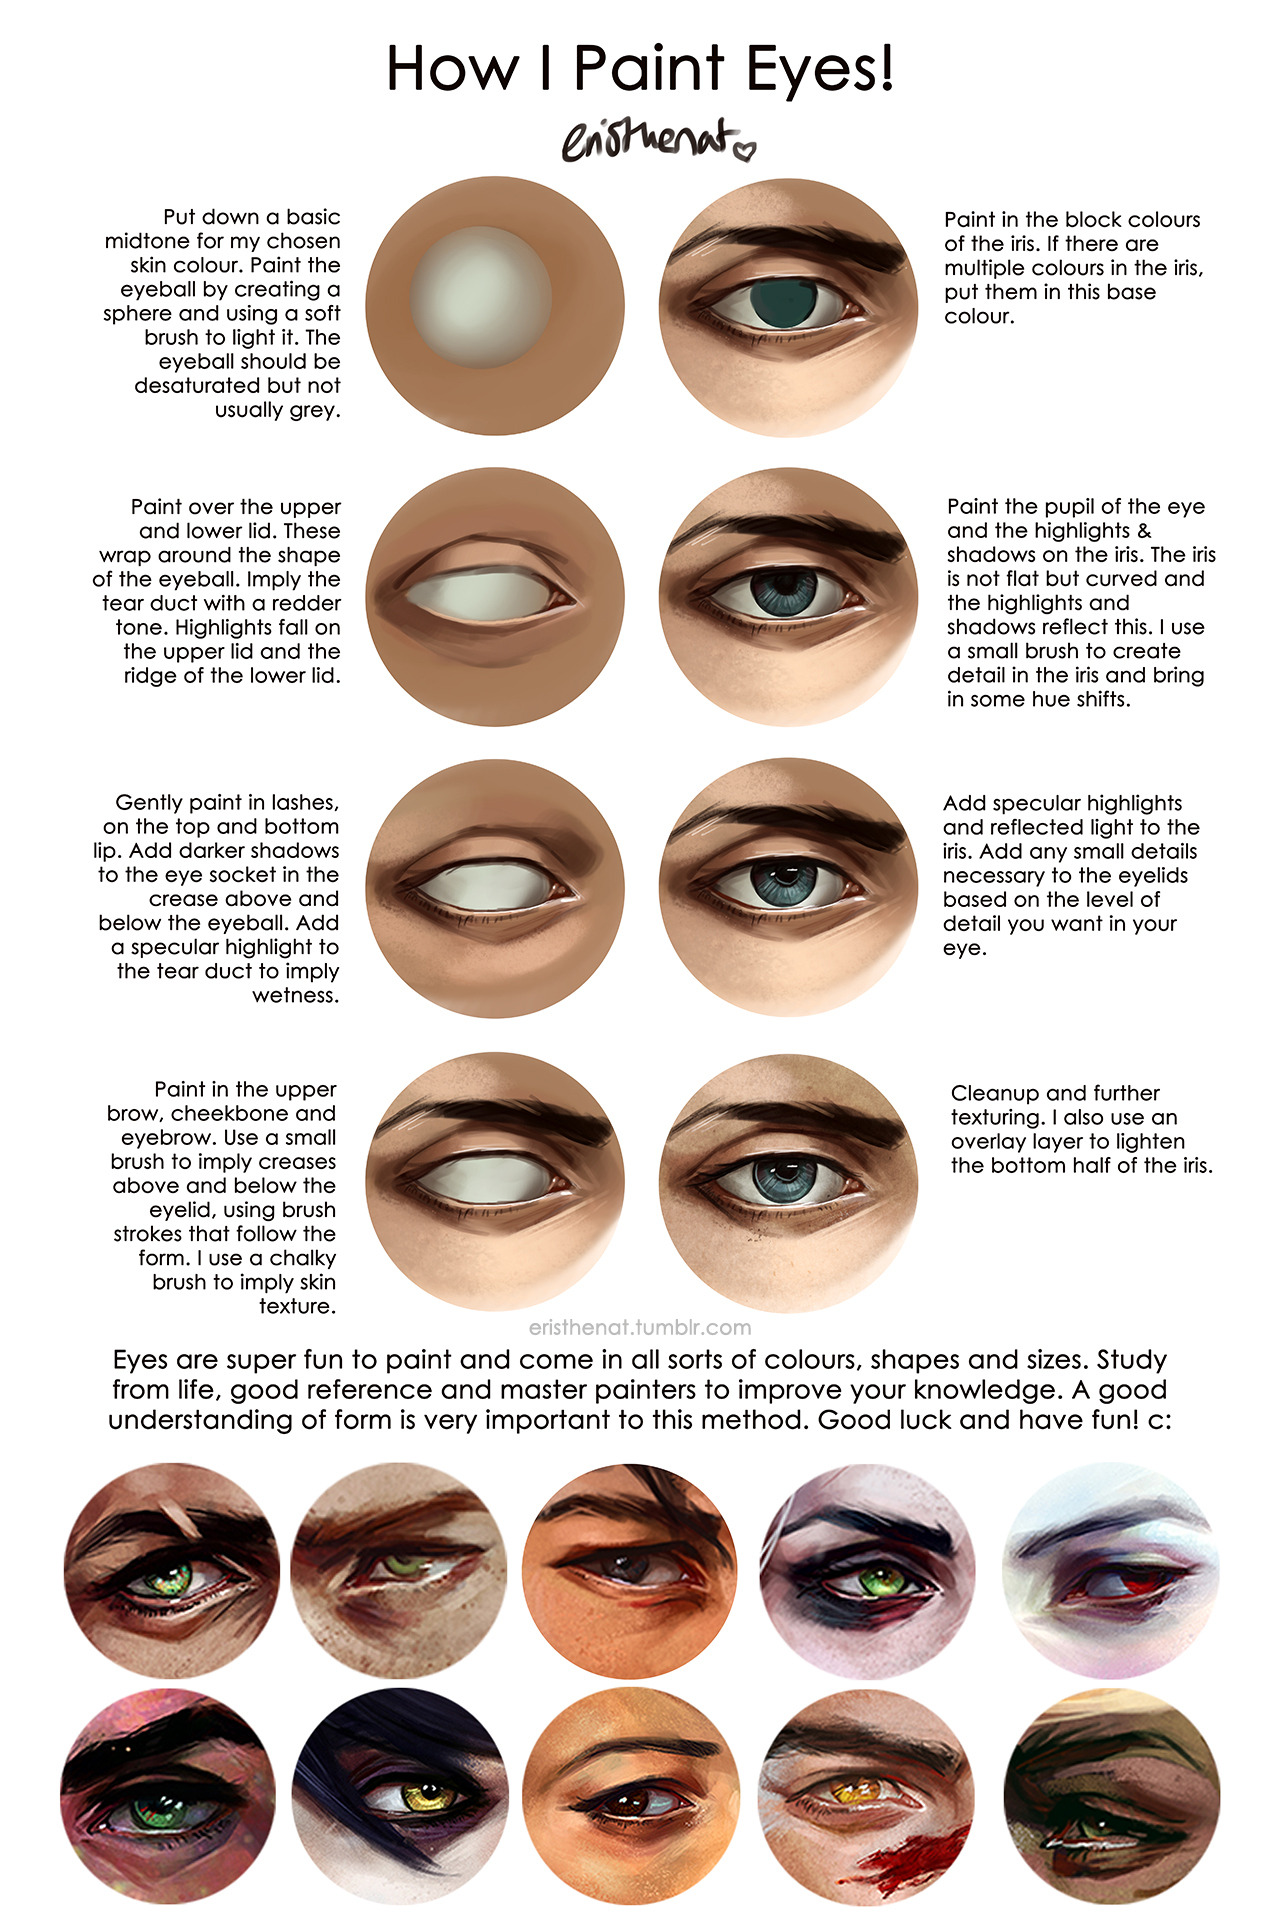
Painted eyes
Eight steps for color: skin midtone and eyeball, lids, lashes and shadow, iris color, pupil and highlights, then cleanup.
Anime eyes
Nine digital steps: block in dark shapes, layer lighter tints, add a gradient, then sparkles and soft color at the bottom.

Make 3D eyeballs HANDS-ON
Turn foam or ping pong balls into realistic Halloween eyeballs.
You need
- Foam balls or ping pong balls
- White acrylic paint (not spray paint, which melts foam)
- Printed iris cutouts
- Red or maroon yarn or embroidery thread
- Mod Podge Gloss
- Toothpicks
Steps
- Stick the ball on a toothpick and paint it white. Let it dry, and add a second coat if needed.
- Cut out an iris and glue it on with Mod Podge. Press the edges flat with your thumbnail.
- Fray short bits of yarn with a toothpick and Mod Podge them on as veins. Keep them off the iris, and use only a few.
- When dry, dip the whole eyeball in glossy Mod Podge for a wet look. Stand it up on its toothpick to dry.